Use BookFunnel’s landing pages and download process on your own domain.
Step One: Own (or Buy) a Domain
If you already own a domain, you can move on down to Step Two!
If you don’t own a domain name yet, you’ll need to purchase one. We like namecheap.com (no affiliation, just our preference), but you can register a domain from any provider. Most authors register their author name or publishing name. If yourname.com isn’t available, you can always try AUTHORyourname.com or yournameBOOKS.com or yourname.net.
If you are only buying a domain so that you can verify it, you do not need to purchase hosting, SSL certificates, or any other upsells when completing the domain registration. Those are only necessary when you are want to build a website on the domain.
Step Two: Create a CNAME
You’ll create a CNAME on your domain and point it to dl.bookfunnel.com.
The precise steps to create a CNAME will vary by domain registrar. Learn more about creating a CNAME.
Step Three: Create the Domain on BookFunnel
Move on over to BookFunnel! Now that your CNAME is created and pointed to dl.bookfunnel.com, you can add the domain to BookFunnel.
1. Click Settings and then click Domains.
2. Click Action and select +Add New Domain.

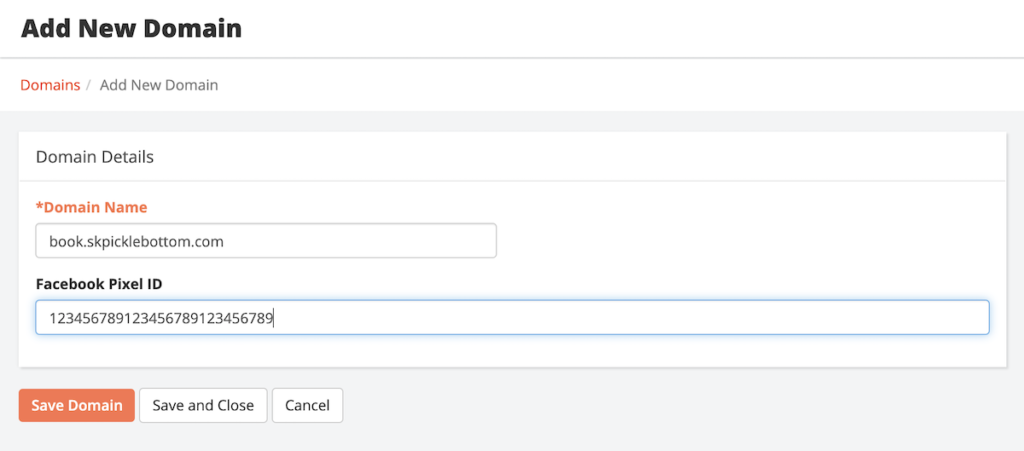
3. Type in your new URL. Example: bf.yourdomain.com
4. Optionally paste your Facebook Pixel ID and then click Save and Close.
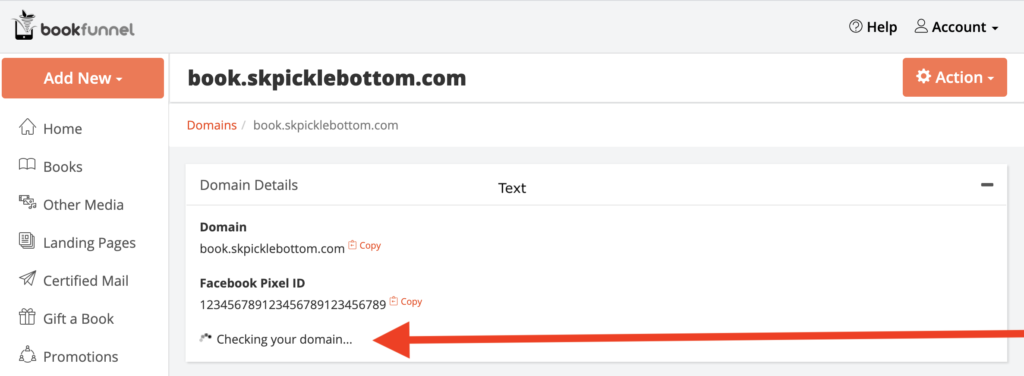
5. BookFunnel will reach out and check your domain name.
6. If the CNAME doesn’t check out, you will see an error message. Please see errors below.
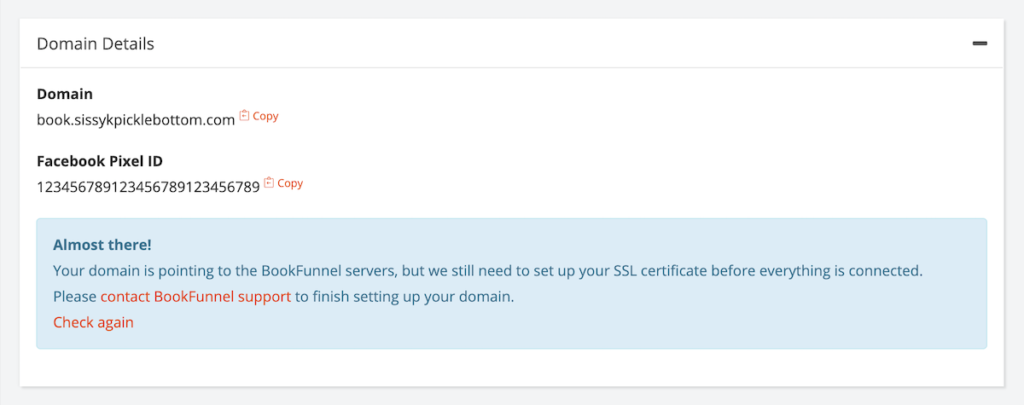
7. If the CNAME is set up correctly, email BookFunnel support! We will manually complete the CNAME registration and SSL certificate. This is a manual process, so please allow 24-48 hours after you send the “Ready to complete domain registration” email to process your custom domain.
CNAME Errors
If your CNAME is not set up correctly, you’ll see an error message when BookFunnel tries to reach out to it. The two most common errors are listed below.
CNAME Does Not Exist
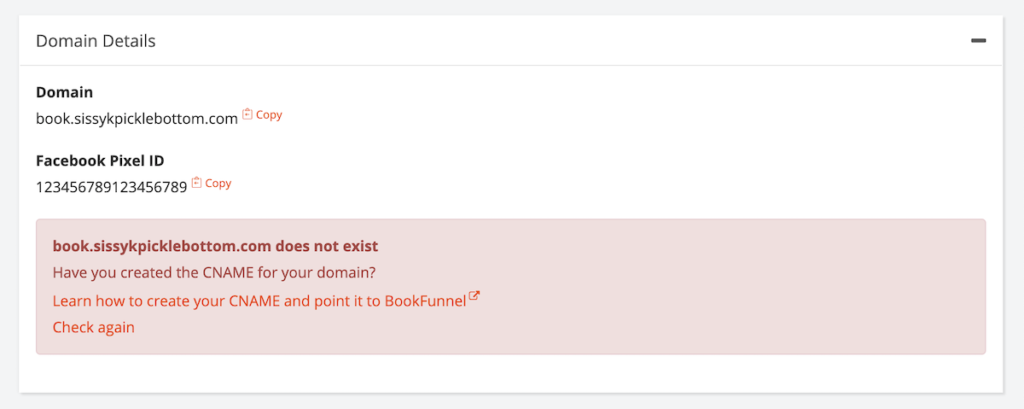
This means that the domain you provided does not exist as a CNAME.
Solution: Check your domain settings for a typo in your CNAME or follow the steps on your DNS host to create a CNAME.
You may have created an A record instead of a CNAME.
CNAME Does Not Point to BookFunnel
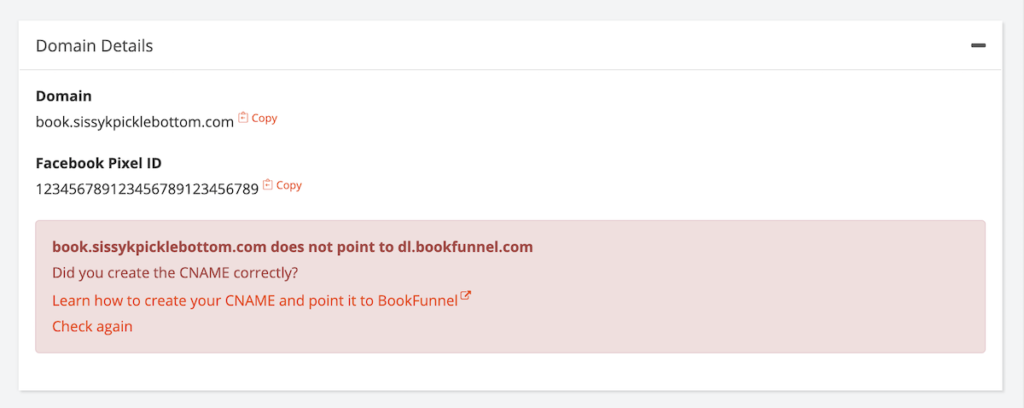
This means your CNAME exists but does not point to dl.bookfunnel.com, so we are unable to complete the setup.
Solution: Check your domain settings to make sure the CNAME is pointing to dl.bookfunnel.com and not to your own website.
Your New Landing Page URLs
Once your domain is live on BookFunnel, you can begin to send readers to your new URL.
Every landing page on BookFunnel will display two links:
- Your original BookFunnel link.
- Your new domain link.
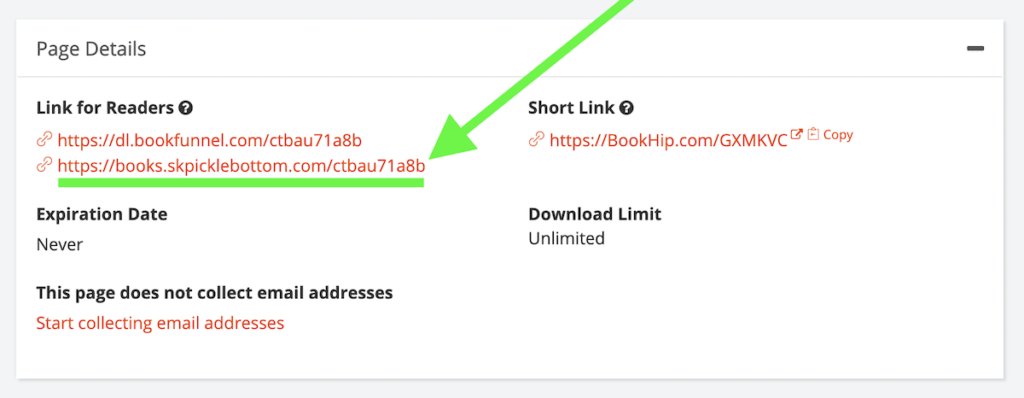
If you create two or more custom domains, you can click to show all custom links so that you can copy the appropriate URL for Facebook.
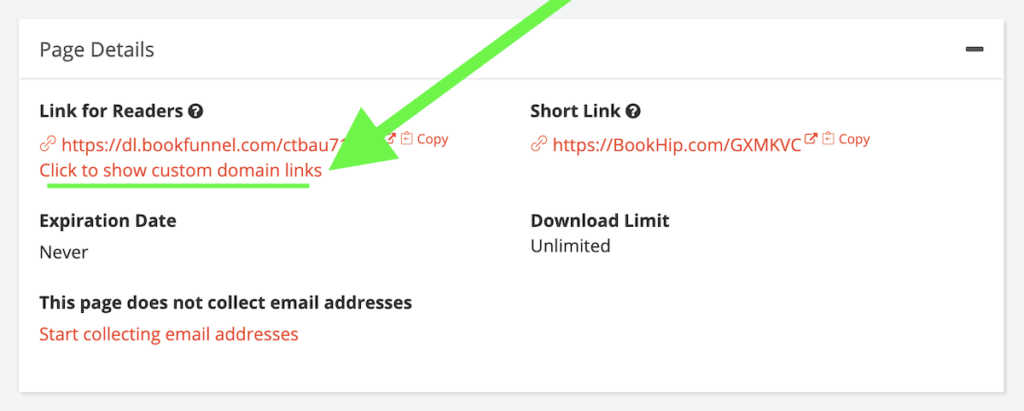
You can use your standard BookFunnel links, or you can use your new, custom domain link. Your choice!
Pretty Custom Domain Links

Once your custom domain is live on your BookFunnel dashboard, you can optionally create pretty custom domain links to share with readers. These pretty links can forward someone to one of your BookFunnel landing pages or to any other website.
Please note that these pretty links should not point to any BookFunnel tracking link. Your tracking link will not record any shares if you use a pretty link to bounce readers around. Use your BookFunnel tracking link or custom domain tracking link so that we can accurately count the number of readers that clicked on your tracking link.
Create a Custom Domain Link
- Click Settings and then click Domains.
- Click your custom domain link.
- Click Action and select +Add Custom Link.
- Type in the link you want to create. Example: bf.yourdomain/offer
- Paste the link you want the pretty link to forward to. Example: https://buy.bookfunnel.com/abc123abc1
- Click Save Link and then close the form.
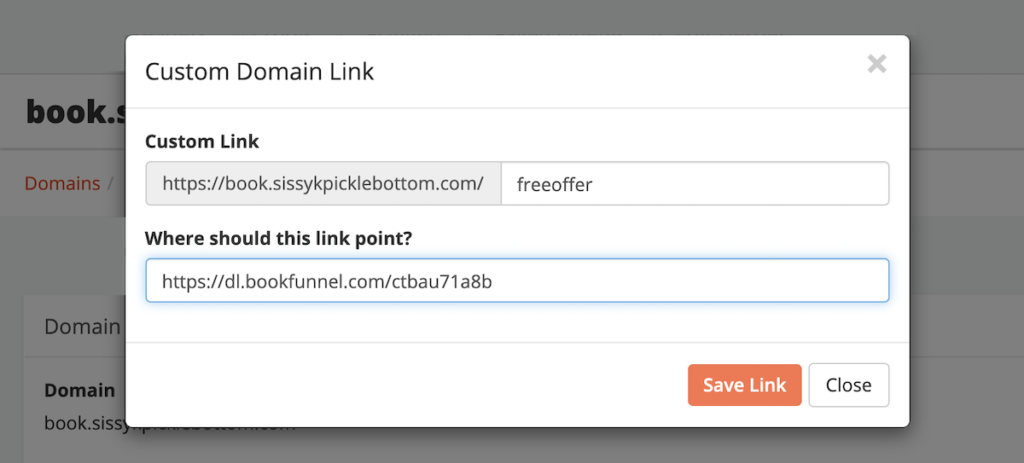
Edit an Existing Custom Domain Link

Once a custom link has been created, you can either edit the link it points to or you can delete it.
- Click Settings and then click Domains.
- Click your custom domain link.
- Click the small Action next to the custom domain link you want to edit or delete.
- Change the link that your custom domain is pointing to.
- Click Save Link and then close the form.
