Do you use Facebook ads and track landing page activity on BookFunnel using your Facebook pixel? If so, Facebook requires you verify your domain.
More from Facebook on the iOS 14 privacy changes that may affect your ads.
How to Verify Your Domain
You will verify your own domain on Facebook and then create a CNAME and point it to BookFunnel. If your author website is yourdomain.com, your new CNAME could be bf.yourdomain.com or books.yourdomain.com. More CNAME examples below.
All of your BookFunnel landing pages will look and behave exactly as they should and the Facebook pixel police will be satisfied. The only difference will be the URL! Instead of sending readers to dl.bookfunnel.com, you can send readers to bf.yourdomain.com.
Can I verify BookFunnel.com?
No. Facebook will only report activity on a domain that you own.
There are a several steps to complete if you want to use a Facebook pixel:
Step One: Own (or Buy) a Domain
If you already own a domain, you can move on down to Step Two!
If you don’t own a domain name yet, you’ll need to purchase one. We like namecheap.com (no affiliation, just our preference), but you can register a domain from any provider. Most authors register their author name or publishing name. If yourname.com isn’t available, you can always try AUTHORyourname.com or yournameBOOKS.com or yourname.net.
You do not need to purchase hosting, SSL certificates, or any other upsells when completing your new domain registration. Those are only necessary when you are want to build an author website on the domain.
Step Two: Verify Your Domain on Facebook
If you’ve already verified your domain on Facebook, you can move on down to Step Three!
To verify your domain on Facebook, follow the steps in Facebook’s help section.
After adding your domain to Business Manager, you’ll verify it by adding the meta-tag to your home page or by adding a DNS TXT entry to your DNS record. If you don’t have a live website on your domain, DNS TXT is the way to verify your domain.
The precise steps to add a DNS TXT entry to your DNS record vary by domain registrar. Google “add DNS txt record NameCheap/ GoDaddy/ SquareSpace” or contact us and tell us where your domain is registered! We can’t do the setup for you, but we can search for help and point you in the right direction.
Step Three: Create a CNAME
You’ll create a CNAME on your domain and point it to dl.bookfunnel.com.
The precise steps to create a CNAME will vary by domain registrar. Learn more about CNAMEs and how to create them.
Step Four: Create the Domain on BookFunnel
Move on over to the BookFunnel dashboard and add your new domain. Learn how to add your domain to BookFunnel.
Your New Landing Page URLs
Once your custom domain is live on BookFunnel, you can begin to send Facebook traffic to your new URL.
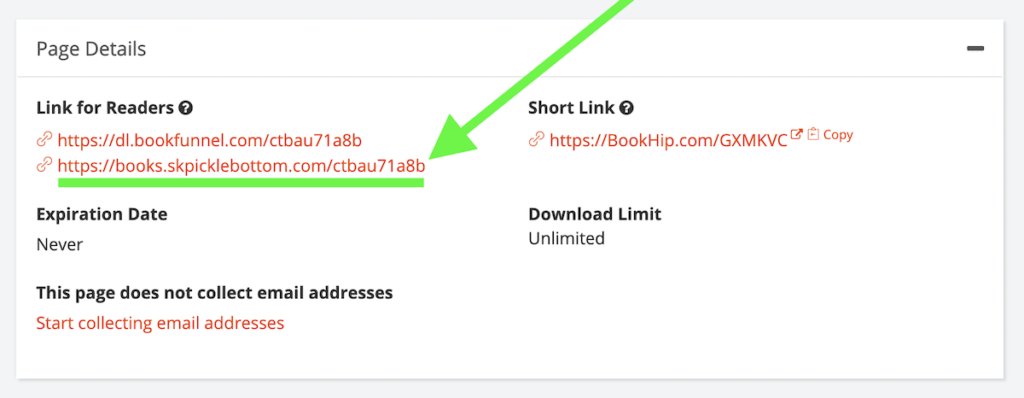
Every landing page on BookFunnel will display two links:
- Your original BookFunnel link.
- Your new verified domain link.

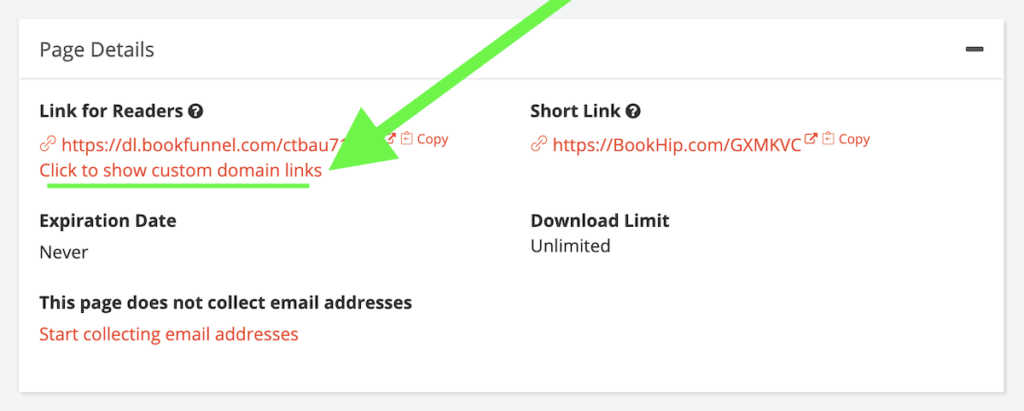
If you create two or more custom domains, you can click to show all custom links so that you can copy the appropriate URL for Facebook.

You can continue to use your original BookFunnel links for non-Facebook related purposes, or you can use your new domain everywhere. Your choice!
If you want your Facebook pixel to report activity on a landing page, you will need to use your verified domain. Facebook will stop accepting your pixel data from dl.BookFunnel.com and Bookhip.com links soon.
