
We are excited to announce our new Author Events and Digital Ebook Signings feature. With this feature, you can host both in-person and virtual signings for your readers, offering you a new and exciting way to connect with them.
To get started, you will need to create an Author Event. From there, you will select the books you want to sign and add tip-in sheets, which are graphics you can customize for each event.
This feature is currently in beta and will be available on the Mid-List Author plan and above.
How to Create an Author Event
- Click the Author Events tab on your BookFunnel dashboard.
- Click the orange Action Button at the top right side of the screen and select Add New Event.

- Enter an Event Name (example: Reader Nation 2025). Readers will see the name of the event.
- Set Event Dates – Setting dates for your event will make it appear on your BookFunnel dashboard during the event dates so that you can quickly find and launch it.
- Choose Signup Options – When emailing signed ebooks to readers, they are offered the opportunity to join your mailing list.
- Select an Integration List – If you have your mailing list integrated with your BookFunnel account, you can select the list, group or segment you’d like the readers to be added to. You can then have a customized welcome sequence set up for your event. If your mailing list service isn’t integrated with BookFunnel, your reader’s information will be stored on a CSV file for you.
- Select Books for this Event – Each event you create is unique. You can customize which of your books you’ll offer for that particular event. Select the books you want to include. Click the box a second time to select another book. You can offer as many books as you’d like. Later, you can add customizable tip-in sheets for each book.
- Landing Page Details – If you’d like to customize the signup form the readers will see, you can click the checkbox to enable and customize the form.

- Fill in Landing Page Details – This will create a landing page that your readers will see when they click the signup link or scan the QR code. You can customize the Page Greeting and the message that appears under the signup form. If you have a Best Seller or Publisher account, you can add images to this page to enhance the experience.
- Click Save Event or Save and Close.
Event Details Page
After you save your event, you will be taken to the Event Details Page. This is where you will customize the books and tip-in sheets you’ll use for this signing.

Event name and dates – This will display the name of the event and the dates that you scheduled your event to run.
Launch Event Window – This is where you will perform the actual signings. You can fill out the reader’s name and email address here. See the Event Window section for more details.
Reader Signup Page – This is a form you can share with your readers to sign up for a signed ebook at your event. The form is hosted on the customized landing page you created.
When you click the Reader Signup Page link in your dashboard, you will have the option to:
- Open the signup form in a new tab to view it
- Copy the link to share with readers
- Create a QR code that links directly to the form
You can download the QR Code to display at your signing event. Readers can then easily scan the code with their smartphones to access the signup form and request their personalized signed ebook.

Export Reader CSV – This will generate a record of the readers that have signed up for this event, and whether you have signed their book. The CSV lists the reader’s name, whether they consented to joining your mailing list, if you have signed their book, and the date you signed it.
Signature Presets – Here you can choose the colors and pen size to be offered on your signing page. We suggest experimenting with this to find what feels comfortable for you.
Books for this Event
This section lists all the books you selected to offer for this signing event. You can add or remove books at any time by editing the event.
NOTE: If the book is already in the reader’s BookFunnel library, the signed book will replace the older version.

Tip-in Sheets: Next to each book, you will see an “Add Image” icon. Click this to upload your own graphic that is unique to that book and event. You can add as many tip-in sheets as you’d like for each book. We accept JPEG, JPG and PNG files for tip-in sheets. If you don’t want to upload a tip-in sheet, you will be able to sign a blank page.
Placement dropdown: The placement dropdown allows you to select where to place your tip-in sheet. The sheet will be inserted at the end of whichever element you select. You can add multiple tip-in sheets and choose which one to use when signing each copy of the book.
Replace Chapter Checkbox: Select this if you’d like your tip-in sheet to replace the element you selected above. This is great if you want to remove the original title page and add a new one with your signature on it, for example.
How to Sign your Ebook
Once you have set up your books and tip-in sheets, you are ready to start signing!
- Click the orange Launch Event Window button on the Event Details page. This will open your signing window.

- Name and Email: If you are talking to a reader directly, you can add their name and email address here. You can also select if they would like to join your mailing list using the provided checkbox.
NOTE: You don’t need to ask for this information from the reader if they already filled out the form on your landing page. - Book To Sign: Here you will select which book you’d like to sign for the reader.
- Tip-in Sheet: Once you’ve selected a book, the tip-in sheets for that book will appear. If you have a waiting reader, you need to select their name before choosing the tip-in sheet.
- Waiting Readers: This is where any readers that filled out your landing page form will be listed, waiting for you to sign their book. When you click the “Sign” button for a reader, it will automatically populate their name and email address at the top of the page.
- Import Readers Button: If you have a list of readers from another platform, such as your mailing list, Patreon, or Kickstarter, you can Copy and Paste their information to add to your Waiting List. Each line must be a comma-separated list of the reader’s email, name, and optionally a comment from the reader.
Once the reader has been selected, choose the desired tip-in sheet. This will open the signing page.
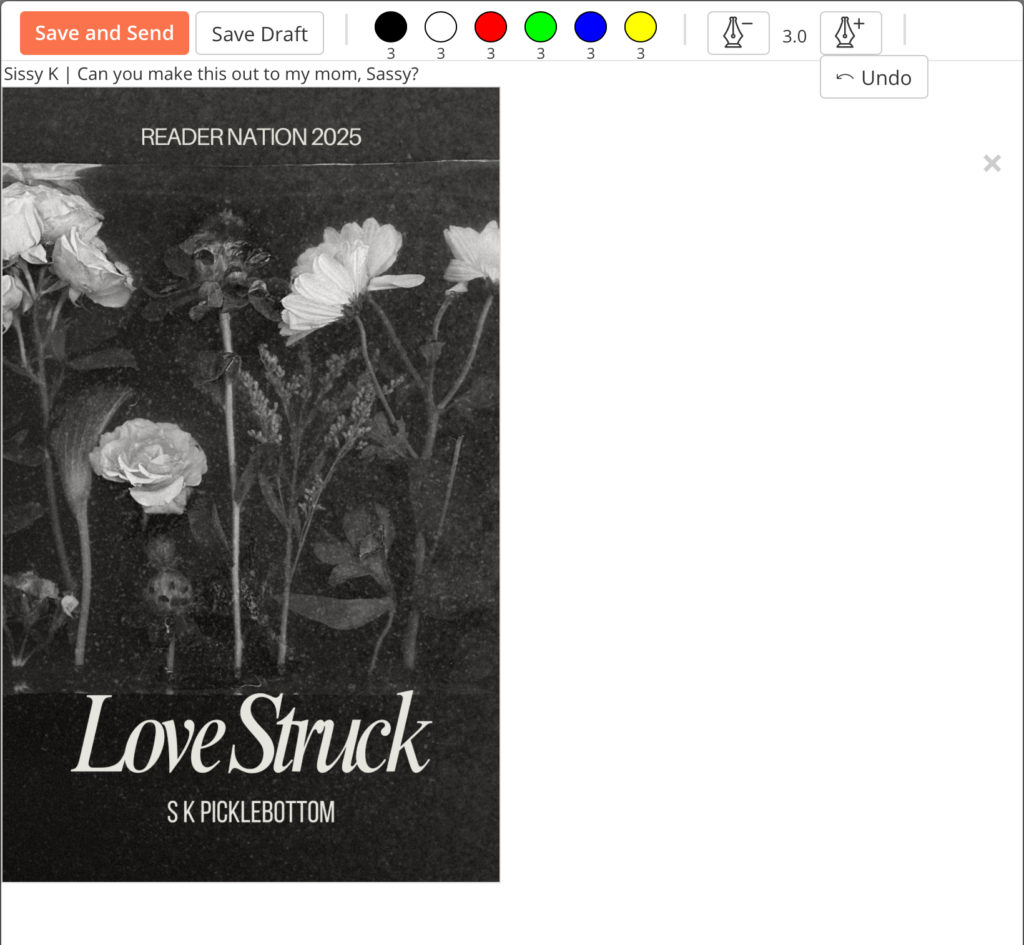
The signing page displays the book element or tip-in sheet, along with the reader’s name and any comment they left for you just above the tip-in sheet. You also have the option to change your pen color and size and click Undo or Clear to remove strokes.
- Sign the book: We recommend using and e-pencil or a stylus for your signing, but you are able to use your finger.
- Save and Send: When you’ve finished signing, click “Save and Send”. The signed book will be emailed directly to the reader and added to their BookFunnel library. The page will then return to the Event Window, ready for your next signing.
That’s it! The reader will receive an email from BookFunnel with a link to their book. It will also be added to their BookFunnel library!